Posted on

Sunday Surprise

Best Summer Berry Trifle

Berry trifles are wonderful summer desserts — they’re simple, gorgeous and you can make them ahead of time. Here’s the key to making them taste as good as they look: don’t use imitation whipped cream, instant pudding or store bought cake! No need to make everything from scratch either. After many trials, I discovered three cheats for making a delicious and easy trifle: (1) store bought lady fingers are just as good (in fact, better) than homemade cake, (2) an easy cream cheese-whipped cream filling makes an excellent substitute for homemade pudding, and (3) tossing the berries with a good quality raspberry jam enhances the fruit flavor and creates a delicious syrup that melds the trifle together. This one is perfect for the 4th!

Servings: 8-10
Prep Time: 25 Minutes
Total Time: 25 Minutes, plus at least 8 hours to chill

Ingredients

  • 3/4 cup (8 oz) seedless raspberry jam
  • 1 quart (1-1/2 pounds) strawberries, hulled and cut into 1/4-inch slices
  • 1 pint (12 oz) raspberries
  • 1 pint (12 oz) blueberries
  • 16 ounces cream cheese (preferably Philadelphia brand), at room temperature
  • 1-3/4 cups confectioners’ sugar
  • 1-1/2 cups heavy whipping cream, cold
  • 1 teaspoon vanilla extract
  • 1 (7 oz) package crisp lady fingers (also called savoiardi biscuits)
  • Fresh mint spring, for garnish (optional)

ingredients

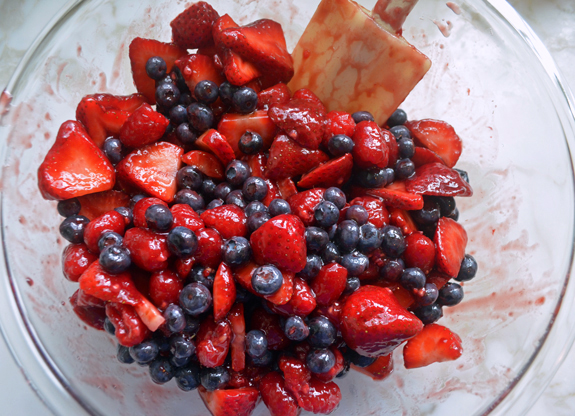
To begin, warm the raspberry jam in the microwave. Toss it with the berries and let it sit while you prepare the rest of the trifle.

berries-and-jam


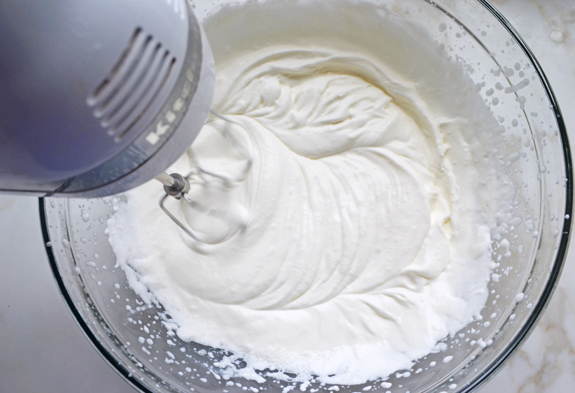
Beat the heavy cream until stiff peaks form, then set aside.

whipping-cream


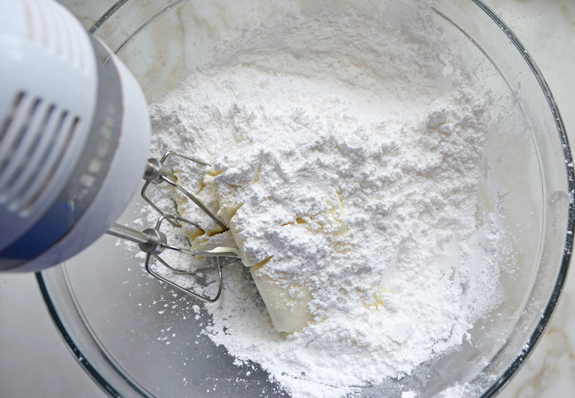
In a large bowl, beat together the softened cream cheese and Confectioners’ sugar.

cream-cheese-and-sugar


Add the vanilla and beat until smooth and creamy.

beating-in-vanilla


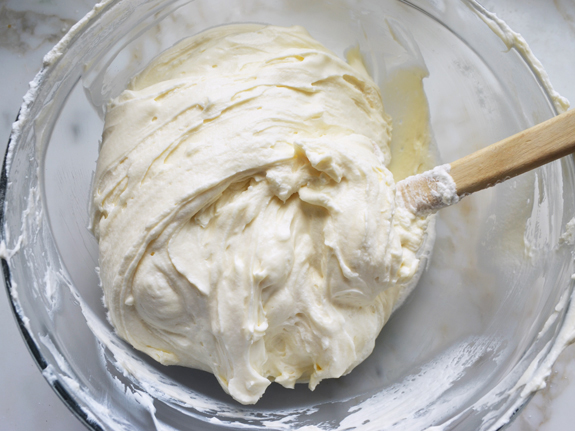
Beat in a third of the whipped cream, then add the rest to the bowl and fold in with a large rubber spatula.

folding-in-whipped-cream


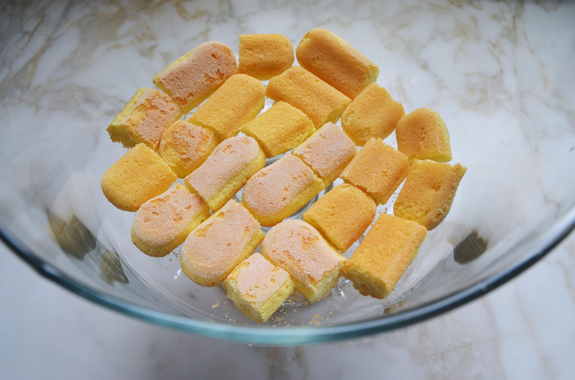
To assemble the trifle, begin by layering the lady fingers in the bottom of the trifle dish.

lady-fingers


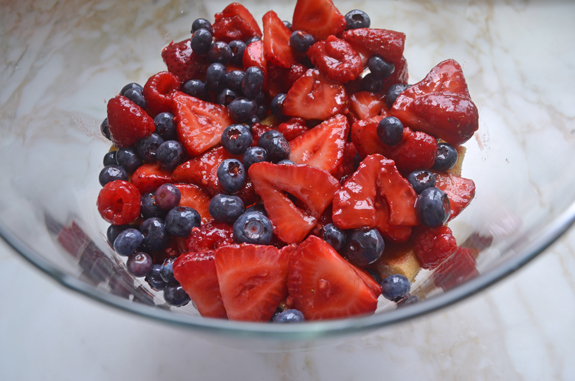
Top with a third of the berry mixture.

fruit-layer


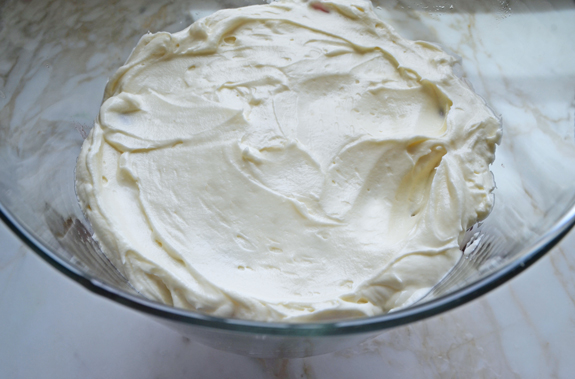
Followed by a third of the cream.

cream-layer


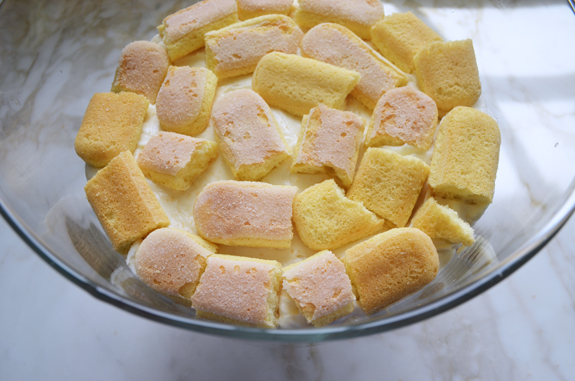
Continue alternating until all of the ingredients are used up, ending with the cream.

lady-finger-layer


Let the trifle chill for at least 8 hours, then top with some fresh berries and a spring of fresh mint, if desired.


 Summer-Berry-Trifle-1
Posted on

Camillia

The most familiar and iconic of these winter-blooming shrubs are Camellia japonica, Asian natives that arrived in the United States around 1798. Despite their aura of Southern gentility, they were introduced in the chilly Northeast and became a status symbol among those who could afford greenhouses where they could be grown. Decades later these tender plants became popular in the milder South, where they could thrive outdoors in all their abundance and diversity.

Camellia flowers are universally adored for their gentle, regular form and their pure colors. ‘Otome’ (left) is a deeply venerated Japanese variety with porcelain-like flowers and delicate veining.

The Wild Orchid will be using camillias in flower arrangements this Mothers Day.

Image result for how to use camellia in floral arrangements +


by them selves they are gorgeous and when added to other flowers just stunning


Posted on

Butterfly Garden

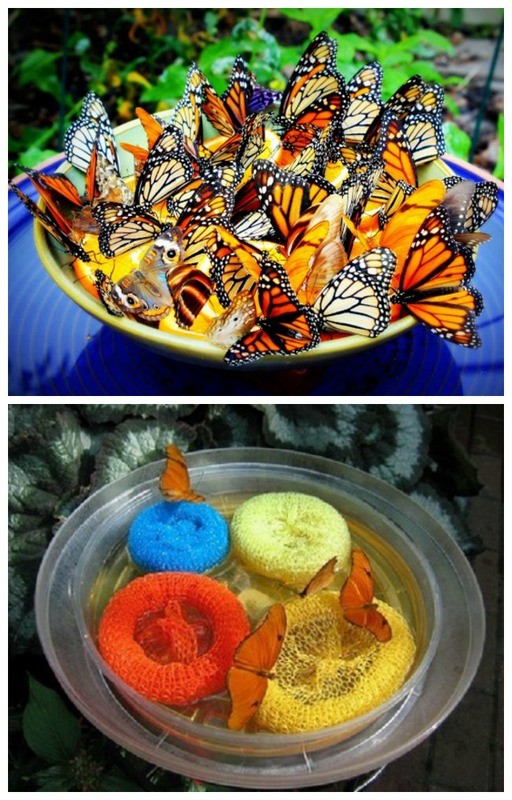
Butterflies not only add to the beauty of our garden but they also help with pollinating flowers. There are over 500 known species of butterflies in Canada and United States, that help the flowers grow. I have gathered these easy handmade ways to make butterfly feeder. These are great for attracting bugs and birds along with butterflies in your garden/ backyard. And lots of fun to make with kids.

Make butterfly feeder

Instant feeder for your garden made from sponges and plastic plate. Butterflies love red, orange, purple and yellow, they have good color vision.


Make butterfly nectar:


Mix 4 parts water with 1 part sugar and boil for a few minutes until the sugar dissolves. Cool the nectar thoroughly before adding it to the feeder. Large batches can be made and stored in the fridge for 3-4 weeks.

Posted on

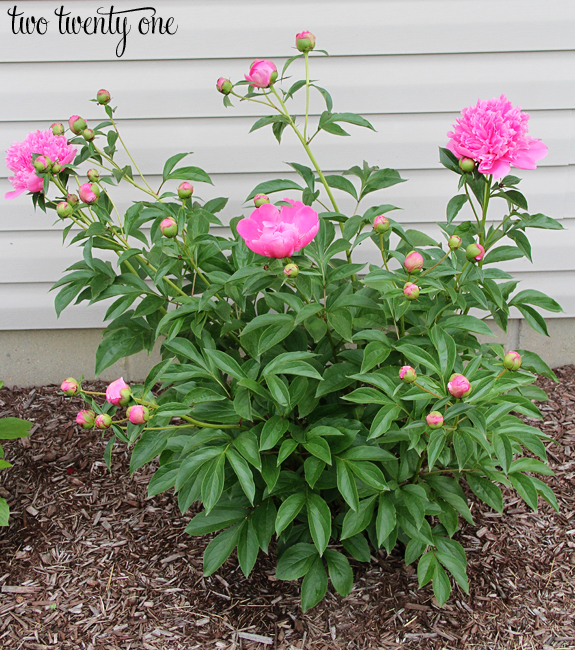
Peonies Mothers Day Special

GROWING PEONIES

Last month when I was posting photos of peonies from my garden on Instagram, people started asking me questions about growing peonies.  So I thought I’d put a post together about what I’ve experienced in my 8 years of growing them.


WHERE TO PLANT

Peonies do well in cooler climates– growing zones 2-8. Click here to find out which USDA Plant Hardiness Zone you live in if you don’t already know. Central Indiana, where I live, is in zones 5

Peonies love full sun. Mine are planted on the south side of our house, where they receive sun from morning to evening. But if you live in a warmer climate you may want to plant them in partial shade.

Plant peony tubers no deeper than 2 inches. If peonies are planted too deep, they won’t bloom.


WHEN TO PLANT

If you purchase peonies from a nursery, you can plant them in the spring or fall. Although I recommend planting in the fall.

Plant roots divided from a mature peony in the fall.  If you need to transplant a peony bush, you should do it in the fall.  And plant peonies 2-3 feet apart.

Here’s a good article on how to divide and propagate peonies.


GROWTH THROUGH THE YEARS

Peonies take a few years to get established, but there are a couple ways to encourage growth.

As you can see, the blooms will start to droop due to the weight of the flowers. To keep peony plants from drooping, you can use these or these. Just put them over your peony plants as they start to sprout out of the ground. The peony stems will grow into them and be supported.

Tips and tricks for growing peonies!


Tips and tricks for growing peonies!

WHEN TO EXPECT BLOOMS

I have two peony bushes I purchased from a nursery and five bushes that were divided and replanted from mature peony bushes.

Also, keep in mind that the blooming period for peonies is very short and they only bloom once.

I planted the two nursery-purchased peonies in the spring of 2010.  These two bushes didn’t bloom until the spring of 2013.  It took them three years to produce any blooms.  It was disappointing to not see blooms for 3 years, but that’s typical with new peonies.

Below is a photo of one of the nursery-purchased peonies.  You can see it had a good amount of flowers for the first year it produced blooms.

I’ve had much more success with the peonies that were divided from mature plants.  I would plant the divided peonies in the fall, and they would produce at least a few blooms the following spring.


Let’s talk about ants because I’ve received a lot of questions about them.  Ants are attracted to the nectar peony buds produce.  If you check out your peony buds early on, you’ll see the shiny, sticky nectar on them.  I’ve read contradicting things about ants.  Some people say they’re beneficial to peonies and help them open, some people say ants don’t make a difference.  Either way, the ants aren’t harming the peonies so there’s no need to spray them with chemicals to kill the ants.  Let nature take its course.


ANTS

If there are still ants on the blooms before I bring them inside, I gently shake the blooms (holding them at the base of the bloom). If that doesn’t work, I run the bloom under water from the outside hose or fill the kitchen sink and dunk the blooms in the water so the ants float off.  Then I send the ants down the drain with the water. And sometimes I’ll pick the ants off with my fingers.

DEADHEADING

When the peonies wilt, I deadhead them. Deadheading is when you cut off a bloom that has run its course. By cutting it off, you encourage the other blooms on that stem to open because the plant is no longer trying to support the wilting flower. Deadheading isn’t necessary, but it promotes root growth.


PREPARING FOR WINTER

After the first frost in the fall, I cut the peonies down to 3-4 inches above the ground and throw away the dead plants. That’s it.


I don’t use plant food of any kind on the peonies.


Posted on

Sundays Edible Weeds

Clover is edible in its entirety. Both White and Red Clover are high in protein, and are always easy to spot once the flowers begin to bloom. The flowers have a nice sweet taste — The leaves can also be eaten raw, but I’ve read that some people have a bit of digestive trouble from eating too much, so most references suggest boiling them for a few minutes before consuming.


When some people hear the word clover they think immediately of the Irish and the quintessential shamrock. Others, myself included, think of grazing cattle, chewing contentedly against a backdrop of pastoral nirvana. And I’m sure there are a select few who that imagine a shaky handy cam scene documenting the Godzilla-esque destruction of New York.

Regardless, today we are talking about your run of the mill, often three, rarely four-leafed field clover. What is often relegated to livestock fodder in the US is consumed with regularity here in the Yangtze River Delta and with good reason. It is extremely high in protein, contains numerous natural vitamins and is darn tasty to boot.

You can usually see clover at the wet market in large heaps amongst the collective that I call sautéed greens. Though edible raw, I tend to find that they are best cooked until they lose the slight bit of stringiness that distracts from their full flavor. As can be imagined of a plant that grows wild amongst the grasses on nearly every single continent in the world, cooked clover has an incredible taste that can best be described as fresh and grassy. It tastes clean and green and possesses the slightest aroma of wild flowers. If you’ve ever had the fortune to stand in a field of clover on a gorgeous early summer day you’ll know the exact essence of which I speak. Clover tastes and smells like just such a day.

Unlike some other wild greens that can be consumed, clover is edible in its entirety. The entire plant, from roots to stem to leaf and flower can all be consumed with no ill effects. But the majority of people, at least here in Shanghai, consume the young leaves and shoots.

I have found a few other recipes online and Chongming Island has an interesting dish of pickled caotou (clover) that I’m dying to try but the standard method of dealing with clover in Chinese cuisine is the straight up qingchao (stir-fry). The flowers are often dried and made into tea which is reputed to treat all manner of malady, be it menstrual pain or cardiovascular weakness; if you can find them fresh, however, you can also toss the buds in a salad and simply eat as is.

And while clover is at its best in the warm summer months between May and October, you can often find it at your local wet market year round. I have a particular weakness for the early first growth that come around March and early April as I find the flavor a little more restrained and the texture much more pleasing to the palette.

We use it regularly at the restaurant, often simply sautéed and used as an alternative to spinach or Swiss chard, especially if I’m trying to highlight the natural freshness in a dish; I’m really tired of seeing spinach on restaurant menus, without a doubt, there is a time and a place for it, but all too often it is a crutch for lazy cooks who don’t want to think about the vegetables accompanying their piece de resistance, especially in Shanghai where there are always at least four leafy greens in season at any given point that are tastier, representative of the region and simply more interesting in flavor. Outside of the sautee I recently tried clover cooked and chopped finely into a variation of the Argentinian chimichurri sauce with outstanding results. The brightness of the clover coupled with the herbs, capers and garlic make an exceptionally delicious accompaniment to any grilled dish.

Or, if you’re like me and can’t leave it alone, you can take said grilled steak, slice it thin, wrap it around a tomato salsa and serve on top of a bed of potatoes, sautéed clover and pickled onions, and then drizzle the chimichurri over the top.

Either way, it just goes to show that there is a lot more to the humble clover than a source for lucky charms.

Recipe for clover chimichurri

Ingredients:

100g clover, blanched and chopped fine; 20g parsley, blanched and chopped fine; 20g cilantro, blanched and chopped fine; 10g fresh chile, chopped fine; 5g red chili flake; 10g dried oregano; 30g capers, chopped fine; juice of one lime; 15ml red wine vinegar; 5 cloves garlic, chopped fine; 40ml good olive oil; salt and pepper

Preparations:

Combine all ingredients and let sit for 30 minutes to allow flavors to meld. Should always be made the same day you plan to eat it, recipe can be scaled up or down with no difficulty.

Posted on

Mondays Magnolias

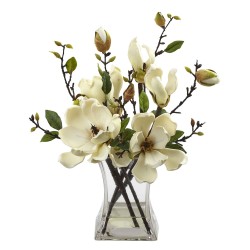
Nearly Natural - 4534-WH - Magnolia Arrangement w/Vase

Magnolia Arrangement  Contact us at The Wild Orchid -515-276-4600

  • Magnoliaceae
  • Deciduous and evergreen trees and shrubs
  • Zones vary by species
  • Full sun or partial shade
  • Regular water

Magnificent flowering plants featuring blossoms in white, pink, red, purple, or yellow. Magnolia trees are diverse in leaf shape and plant form, and they include both evergreen and deciduous sorts. They aren’t usually munched by deer.

The following text classifies magnolias by general type; the chart lists species, hybrids, and selections alphabetically. New magnolias seem to appear almost hourly, but most garden centers carry only a few. To track down a prized selection, you’ll probably need to hunt through mail-order catalogs.

Magnolia Tree Types
Whether evergreen or deciduous, most magnolias have large, striking blossoms composed of petal-like segments. A few are grown for use as foliage plants.

Evergreen magnolias. To many people, the word “magnolia” is synonymous with our native Magnolia grandiflora, the classic Southern magnolia with large, glossy leaves and huge, fragrant white blossoms―the state flower of Mississippi and Louisiana. Few trees can match it for year-round beauty. It does, however, have its drawbacks. Unnamed seedlings often take 10 years after planting before they come into bloom. Dense shade and shallow roots make it impossible to grow grass beneath the canopy, and the roots often crack and lift pavement if the tree is planted between sidewalk and curb. Leaves drop 365 days a year. And since the tree grows as wide as 40 ft., it takes up a lot of garden space.

Sweet bay (M. virginiana), a smaller tree, is easier to fit into most gardens. Though mostly deciduous in the Upper and Middle South, it’s evergreen in the Lower and Coastal South and more cold hardy than
M. grandiflora.

Deciduous magnolias with saucer flowers. This group includes the popular saucer magnolia (M. x soulangeana) and its myriad selections, often called tulip trees because of the shape and bright color of their flowers. They prefer fertile, acid, well-drained soil. They do not tolerate heavy wind or salt spray. Early-flowering selections are prone to frost damage. Related to these, but less tolerant of winter cold and summer heat, are the spectacular magnolias from western China and the Himalayas―Sargent magnolia (M. sargentiana) and Sprenger magnolia (M. sprengeri). Though their early flowers may fall victim to late freezes, one spring season with good blooms will quickly make you forget the disappointments of years past.

Deciduous magnolias with star flowers. This group includes Kobus magnolia (M. kobus), Loebner magnolia (M. x loebneri), and star magnolia (M. stellata). All are cold-hardy, heat-tolerant, adaptable plants. Late frosts sometimes damage their early blooms.

Other magnolias. Less widely planted―but deserving of greater attention―is a group of large-leafed native magnolias generally grown as bold accents or shade trees. Cucumber tree (M. acuminata) and its smaller sibling, yellow cucumber tree (M. a. subcordata), are the source of the yellow blossom color of many new hybrids. Bigleaf magnolia (M. macrophylla), umbrella magnolia (M. tripetala), Fraser magnolia (M. fraseri), and Ashe magnolia (M. ashei) are medium-size trees with huge leaves and large flowers that appear after the leaves unfurl.

In its own category is Oyama magnolia (M. sieboldii), native to western China. It bears drooping, cup-shaped, fragrant blooms after leaves emerge.

Magnolia Tree Culture
For any magnolia, pick planting site carefully. Virtually all types are hard to move once established, and many grow quite large. The best soil for magnolias is fairly rich, well drained, and neutral to slightly acid; if necessary, add generous amounts of organic matter when planting. Southern magnolia (M. grandiflora) is good for planting at the beach, though not on dunes. Sweet bay (M. virginiana) tolerates wet soil. The species and selections listed in the chart are adapted to a wide range of growing conditions and are easy for most gardeners to grow.

Magnolias never look their best when crowded, and they may be severely damaged by digging around their roots. Larger deciduous sorts are most attractive standing alone against a background that will display their flowers at bloom time and show off their strongly patterned, usually gray limbs and big, fuzzy flower buds in winter. Small deciduous magnolias show up well in large flower or shrub borders and make choice ornaments in Asian-style gardens. Most magnolias are excellent lawn trees; try to provide a good-size grass-free area around the trunk, and don’t plant under the tree.

Balled-and-burlapped plants are available in late winter and early spring; container plants are sold all year. Do not set plants lower than their original soil level. Stake single-trunked or very heavy plants to prevent them from being rocked by wind, which will tear the thick, fleshy, sensitive roots. To avoid damaging the roots, set stakes in planting hole before placing tree. Prevent soil compaction around root zone by keeping foot traffic to a minimum. Prune only when absolutely necessary. Magnolias seldom have serious pest or disease problems.


In Des Moines check out the http://www.magnoliawinekitchen.com/

 

Posted on

Happy Earth Day!!!

EARTH DAY: THE SYMBOLISM OF NATURE

By Cassier Brewer
Posted on

Friday Flowers

Freesia

Named after the German physician Friedrich Heinrich Theodor Freese, freesia – with their bell-shaped blooms and sweet, citrus scent – are among the most popular fragrant flowers. And, while in most cases the white variation of a flower is the most fragrant, in the case of freesia, the pink and red varieties are actually more highly scented. With their wiry stems and delicate blooms, it’s not surprising that one of the most popular freesia varieties is named Ballerina.

The 7th wedding anniversary flower, in the language of flowers, freesia are said to symbolize innocence and friendship

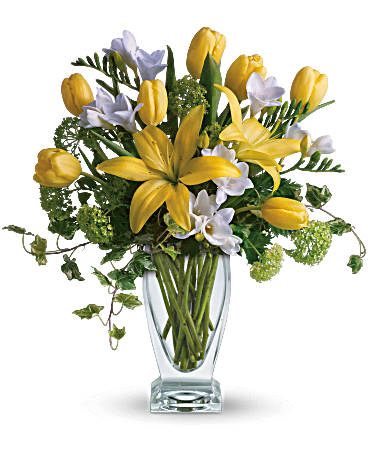
Teleflora's Spring Rhapsody Bouquet

Are you excited with thoughts of filling baskets of morel mushrooms to overflow capacity? Here are some tips to help you have a great mushroom harvest this year.

If morel mushrooms aren’t already showing up where you live they soon will be. Are you ready? Here are ten quick tips to help fuel your morel mushroom daydreams.

1. The temperature is just right and slope of the hill.

I’m not saying that morels are fickle or anything, but they are a little like the baby bear who wanted his porridge to be “just right.” Keep an eye on the temperature outside. Morels like it when it starts to get around 60 degrees and above during the day, and night temperatures hover around 40 degrees. Also, get yourself a soil thermometer and check the temperature of the soil where you hunt. Morels start popping up when the earth gets between 45 degrees and 50 degrees.  The side of a hill that gets more sun will, of course, get warmer before the other side. That’s where morels will start showing up first. Check those south-facing slopes early in the season.

2. Know your trees.

Morels can be tree huggers. Learn to identify the trees, with and without their leaves, that morels like to hang around and you’ll be more successful. Elm, ash, poplar and apple trees are well-known morel mushroom favorites. Look for dead and dying trees too. But bear in mind that morels also show up wherever they show up.

3. The lay of the land.

Morels like loamy soil. Loamy soil is what you might find in creek bottoms. It’s well-drained, moist but not wet, has a good mix of clay, sand, decaying matter, calcium and/or lime. But again, morels can appear wherever they appear. I’ve found them growing in gravel  and under pine trees.

4. Disturbed ground is good ground.

Burn sites and logging areas are often prime morel locations. Check online sources for wildfires that occurred the previous year in your area.  Pay attention to wooded areas that have been torn up by large equipment or logging operations. Morels like areas that have also been disturbed by flooding.

5. After a rain.

A warm spring rain can be just the right medicine for getting morels to show themselves. If the temperatures are right (see #1 above) and you get a nice rain, mark the following day on the calendar as “morel hunting” day.

6. Pack a lunch.

Of course you can head out to hunt and harvest mushrooms, and then go right home to clean and cook them. But most of the best days I’ve had hunting morels, whether I’ve found mushrooms or not, have been the days that I brought a light lunch to enjoy in the field.

Sitting down with your back to a tree, with a sandwich and a thermos of hot coffee, is a simple pleasure not to be missed. You might even pack a small camp stove, pan, and a tin of butter to easily fry up a few morels right there. You’ll probably find that they taste even better when eaten in the woods.

7. Other tasty treats.

Morels and fiddleheads go together like peas and carrots. Keep an eye out for ostrich fern fiddleheads (not all fern fiddleheads are edible, so be sure to properly identify). Ramps are also a spring delicacy. A basket full of morels, fiddleheads and ramps is a beautiful thing.

8. Take a few pictures.

A camera is a wonderful item to bring with you when foraging. These days most smart phones have excellent cameras already included. Photos are also a great way to share your outing and any cool things you may see. A small journal is another useful item to record your observations, and could be useful in planning future outings.

9. Those darn ticks.

You may not find morels every time you hit the woods, but you can probably bet on a tick or few finding you. Lyme disease is not something to take lightly. Dress appropriately, use a tick repellant and be sure to give yourself a once-over when you get home.

Good luck, have fun, and good eating!


 Spring-Trio-large


Posted on

Tropical Thursday

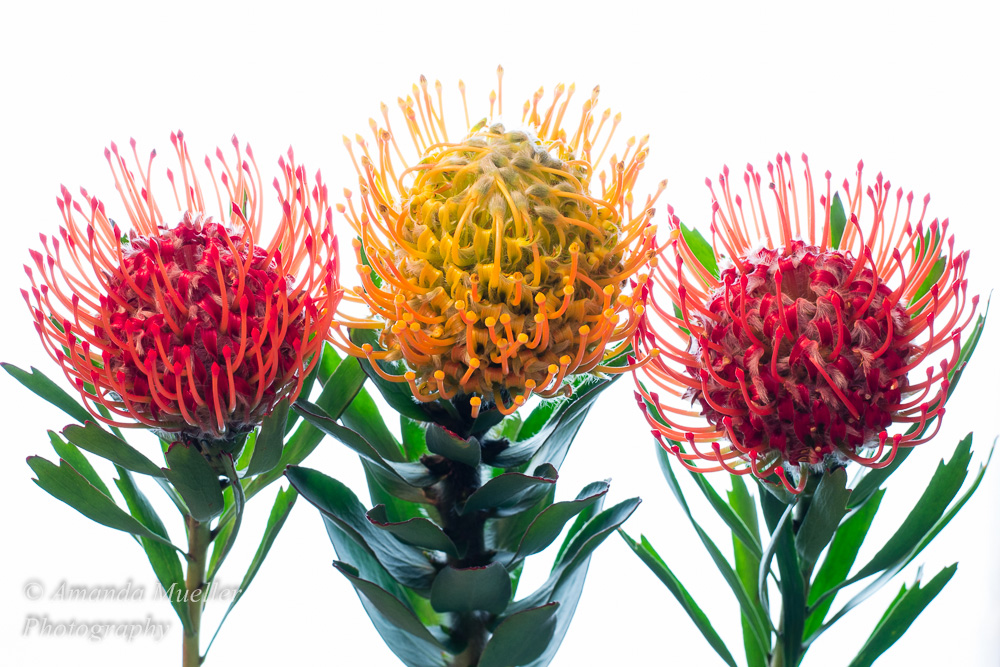
Pincushions are a delightful – Protea Pin Cushion Flower is an unusual yet stunning flower that will add a touch of the exotic to your event. This novelty flower gets its name due to its resemblence of a pincushion! Displaying a rich orange, yellow or red color, this bloom would be an amazing statement!


Image result for pincushions flowers


Check out some of our tropical bouquets!

https://www.thewildorchidllc.com/product/sandy-beach/

Relax with a tropical drink pineapple iced te

Makes 12

  1. Stir first 3 ingredients together, add splenda to taste if desired, and chill in the refrigerator until ready to serve.
  2. Garnish with lemon slices, diced pineapple chunks on skewers, and or diced kiwi.

Happy Hour, Ice Cream and More…